Here are some tips and tools for adding the ideal photos and images to your lot and listings to help you sell. These computer tips can help you both improve bad photos and create new images — like aerial photos — for online listings when you don’t have any property photos at all. And while we think these tips are especially useful for selling land and lots, they also can help you enhance listings for finished homes too.
Property Seller’s Dilemma – What if You Have Bad Photos…Or No Photos At All?
Photos sell real estate. But many lot and land owners, and the agents working with them, struggle about choosing compelling property images for their online land listings. Vacant land can be less photogenic and it’s just not as easy to photograph when compared to finished homes with beautiful features. So in a related article we explained the right types of photos and images to use in online listings to really help you sell your lot and land properties.

We encourage you to take the time to put together a collection of images that showcase the best features of your vacant lot or land, but what if you don’t have the right kinds of photos on hand – or you just don’t have any photos at all?
The biggest mistake is to do nothing, and not include any photos or images in your listings. As we explained before, research shows that you must add photos or images to your listings or you won’t attract the attention of buyers.
So here are solutions that can help you add images to your property listings without ever leaving your computer, and that can both help you sell faster and for more money. We start by describing how to use cropping and screenshots to improve your existing photos. Then we describe how you can use these same techniques to create aerial images of your lot or land listings using online satellite map tools.
Use Cropping & Screenshots to Improve Property Photos
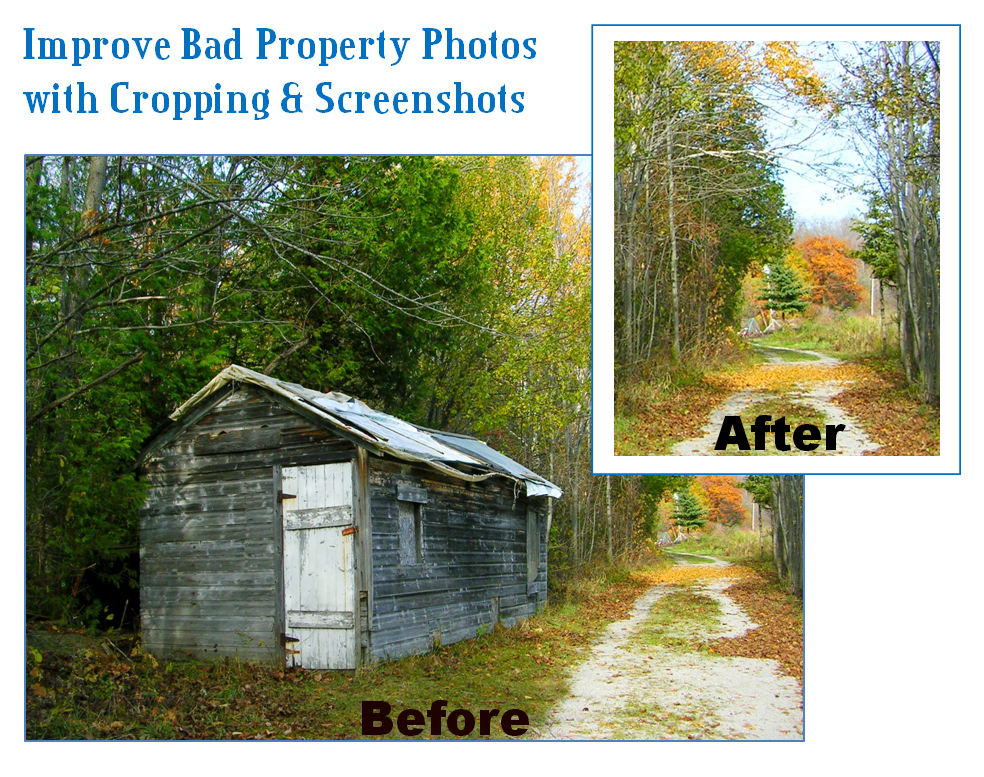
As we noted in our article about Tips for Great Photos for Lot & Land Listings the images in your real estate listings should focus on the best features of the land. You can achieve this by using cropping and screenshots. Cropping is a basic photography technique that simply involves removing unwanted elements from an image by adjusting and improving the framing. Cropping and screenshots are powerful tools for making a bad photo into a compelling one that can help you sell your property.
If your existing property photos really aren’t great, in just a few minutes you can crop your existing images to remove distracting elements (like roads, a rundown shed, the neighbor’s junk, etc.) or to just change the focus of an image. A cleared vacant lot can be shown in a more beautiful and attractive light if your photographs for your listing focus on natural elements, the view and other amenities. Just click to open your not-so-great photograph and view it on your computer, and then use photo editing or a screenshot tool to focus on a cropped portion of that image.
There are numerous online tools and software programs that you can use to edit photographs. PicMonkey is an easy-to-use online system that we like (includes both free and paid upgrade options). We suggest you do a quick search to find a well-reviewed photo editing system that works for you.
An alternative way of cropping an image on your computer is to take a screenshot of the photo. The most basic screenshots will result in an image of the entire view in your computer’s monitor, but we like to use tools that allow you to control and crop select parts of your screen.
Much like photo editing, there are numerous products for creating screenshots. Windows 7+ users can use the built-in Snipping Tool. Some other screenshot products we like include Jing (free) and Snagit, a more advanced option by the same company (but not free).
With both cropping and screenshots, be careful about the quality of the final cropped image – you essentially are zooming for a close up view of the photo, so if you crop too tightly (or the original image already is low quality) it will make the cropped image appear blurry.
Here’s a demonstration of how cropping and screenshots can be powerful tools for making a not-so-great photo into a compelling one that can help you sell your property.
Example: Improving Your Vacant Lot Property Photos with Cropping and Screenshots
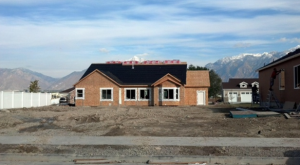
This is a photograph of a vacant lot. It’s hard to tell, but the house centered in the photo is not on the lot (it’s on another lot beyond). The lot has been cleared, it has no positive natural features and most of what you see in the frame are adjacent homes. A cleared vacant lot like this is not photogenic.

But look in the background!
Using the same photograph and a basic computer screenshot tool, we instead focused the image on the view of the beautiful mountains in the background.
It’s not perfect, but that’s much better. With the cropped image we have accentuated a positive (the view) and limited the visibility of some of the distracting negative elements. Consider adding an aerial photo to the listing too (see below), which is another good way to show an image of a cleared vacant lot like this. Read our related article that helps property sellers learn more about selecting the best photos for their lot and land listings.
Create Aerial Images & Maps with Screenshots
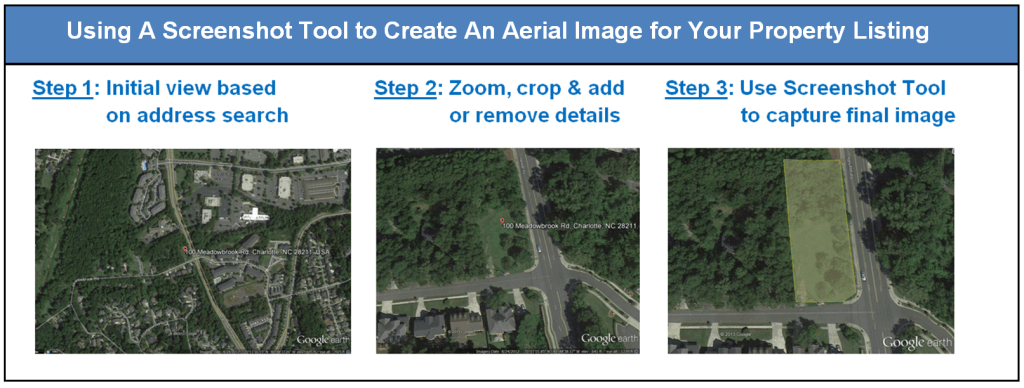
On-the-ground photos are great for your online property listings, but aerial images are one of the strongest tools that you can use to market vacant land because they help you show a visual overview of the property that is being sold, as well as general lot lines, other features and nearby amenities. Sometimes it is not feasible for you to use a professional photographer for your aerial imagery, but another method of getting an aerial overview of your property is using online satellite images. And with the screenshot techniques we have just described, you can create an aerial image of your property to include in your online listing, all without ever leaving your computer.
There are numerous online resources that provide satellite imagery. Google Maps and Bing Maps are two popular online mapping services that provide nationwide coverage with satellite images of almost every inch of land in the country. You can easily enter a property’s address and adjust the zoom to find your preferred view of the property.
Other resources for satellite imagery include online interfaces for local Geographic Information System (GIS) mapping services. Although they may not be available everywhere, GIS systems are becoming very common and most county or local governments make a wealth of information available as a free online service. Just search for the county’s name and “GIS” and you’ll likely be able to find a link to your local GIS system. Here’s an example of one of the many GIS websites offered by local governments in the Charlotte, NC metropolitan area. Some GIS systems show helpful details like property lines, as well as a variety of other information related to each parcel or area that is mapped.
With all the options that are available online we cannot go into specific details about how to use each system, so just spend a few minutes exploring the features of your selected mapping systems to find out how they work. You may have to adjust the “Layers” that are displayed in a GIS system so that you see the satellite image instead of just a map view. Both Google Maps and Bing Maps allow you to display different levels of data between satellite views and street map views. In some systems you can see lot lines.
Using these tools you can create multiple aerial photos – at different zoom levels – and even area maps, all of which can be added as images to your online listing to help attract buyers.
Before you plan to use an online satellite image, it is appropriate to make sure that your use of the image is allowed by the guidelines or terms and conditions of the map provider. Each system is slightly different, and every user’s scenario is unique. But as an example, according to Google its satellite images can be used for an advertisement (or online listing), but attribution should be given to Google and/or the mapping company from whom it got its satellite image data. This can be done by including the company names that are displayed in the aerial images (usually near the bottom, in the middle or right corner) when capturing the screenshot, as shown in the examples in this article. Be aware that there can be limitations on how much you may alter an image.
Now that you have satellite images selected, you just need to use a screenshot tool as described above to capture your images and save the maps and aerial views. Note that some mapping systems and screenshot tools have features that allow you to add captions, highlight property lines, show the property with a color and other helpful enhancements.
Be sure to save your photo as an image file like JPEG or PNG. This allows you to upload the image in the photo gallery shown at the top of your listing on LotNetwork.com. We’ve made the Photo Upload interface user-friendly and allow our customers to upload as many photos as you want to your listings.
Now you are ready to improve your property photos to show the best features of your property. So add your listings and upload your photos, aerial views and other images right away to help you start attracting more buyers to your property.
Agents & Brokers, be sure to check out our Resources for Real Estate Pros page to learn more tips and tools on LotNetwork.com that can help you and your business.
We also have other Resource pages with tips and information on the following topics:
Related Articles:
- Photos Sell Real Estate: Tips for Great Photos for Lot & Land Listings — lotnetwork.com
- How to Sell Lots and Land (and Why it’s Different from Selling Homes) — lotnetwork.com
- Online Listings to Sell Lots or Land: Five Tips to Help Spur a Successful Sale — lotnetwork.com


